Posted on

What is a limited edition print?

Ever wondered what those numbers in the bottom corner of an artwork really mean? Is it a good thing if the number is small or big? Editioned prints can confuse people… even those who have been working in the art industry for some time.

I’ll explain how I go about editioning my own lino prints and it might help shed some light.

When I design a lino artwork I decide how many copies of the print I will make. I print exactly that amount and no more. Each print is then labelled in the bottom left hand corner. The first print is labelled number 1, the next number 2 and so on. The number is written in front of another number which states the total amount in the edition so the owner knows exactly what they have bought. For example 1/20 means they have bought the first print in an edition of just 20.

Why is it important?

If an artist’s work becomes significantly valuable then this is vital information for valuers as a print from a small edition is going to be worth more than a print from a large edition due to its relative rarity. Not many printmakers are expecting their work to be valued at Christie’s, however it is still an important responsibility when selling prints to let the buyer know exactly how many other copies exist in the world and therefore how unique their purchase is.

Big editions or small?

Some artists sell in huge editions, particularly if their work is popular and they can satisfy a large market of buyers, but also if their prints are made by a process that easily produces large quantities eg digital printing. They may even have technicians to help with the workload. This is all great news for the artist and doesn’t really de-value the print itself to the current owner.

When I print my editions the numbers are a lot smaller. I choose an edition of around 20 for my smaller pieces and as low as 5 for the larger artworks. This is because printing by hand with a baren is hard work and I have chosen a career as an artist and not a machine! 

Printing in small editions does mean that the artworks are pretty special… there’s not many of them in the world. But then, I would argue that what makes a piece of art truly special is what it means to you, regardless of any numbers, price tags or editions.

Posted on

Small Wonders

The lino printing project I am currently working on is a small one.

After spending the last two years producing large prints for the walls at Chalk Gallery in Lewes, I have recently returned to working on a more intimate scale, similar to that with which I began my work as a lino printer and first became absorbed with this addictive process.

The subject matter I am studying at present also lends itself to attention on a smaller scale, with a quiet and gentle focus; Snails, and garden insects, small creatures going about their daily business, easily overlooked but so important in the part they play in the larger story of biodiversity.

The idea came to me while I was walking alongside the local riverbank one morning after the rain.

I live in a beautiful part of the countryside and find inspiration easily in the natural landscape around me. Unlike many of the other local artists who I am friends with however, I find myself drawn to the detail. While they paint outside in all weathers, recording the undulating hills of the South Downs, the swathes of grassland or vast seascapes I tend to find myself gazing at a single blade of grass. My countryside walks are never long ones and I have usually found something to draw or photograph within a few yards.

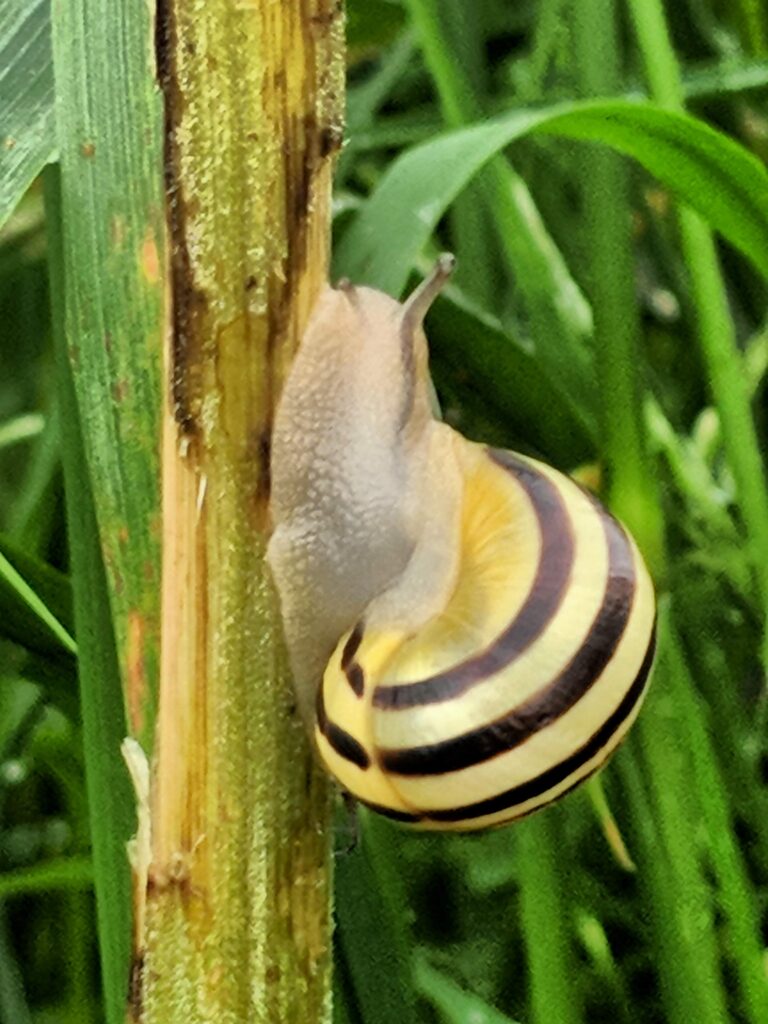
On this particular morning it was the brilliantly coloured baby snails which caught my attention, straggling across the path (I rescued a few) and winding themselves up cow parsley stems. The contrasting pale yellow and deep brown stripes on their shells is an excellent design; eye-catching, high in contrast and almost hypnotic. Perfect for printmaking. It wasn’t long before I was crouching among the wet grass with my mobile phone and some curious looks from passers by. The idea to create some small works, celebrating small wonders, was fully formed

The project is currently in its very early stages with two potential linoprints begun this week. Carving designs on this scale presents some challenges of it’s own. The temptation would be to use smaller and smaller tools in order to capture finer and finer detail. However for me it is always the “maker’s mark” which appeals in linocuts, so apart from a few very fine marks, the main image has been carved with my favourite pfiel tool number 9. Carving with this approach means simplification is necessary, and conscious choices have to be made about what is truly important to the image and helpful in the design.

Re-creating a small subject on a small scale is satisfying in it’s symmetry. The final pieces in this project will be small, and will need small frames, and a quiet space to be enjoyed. They would be lost on a feature wall. I like the thought that one day in the future, when someone pauses on a staircase, or a landing, to look into the frame, they will be greeted with a special and intimate moment, rather as I was that morning on the riverbank with the snails and the rain. It will feel meaningful.

Maybe art doesn’t always have to make large statements. Sometimes it can make connections instead.

Posted on

Making a Reduction Lino Print

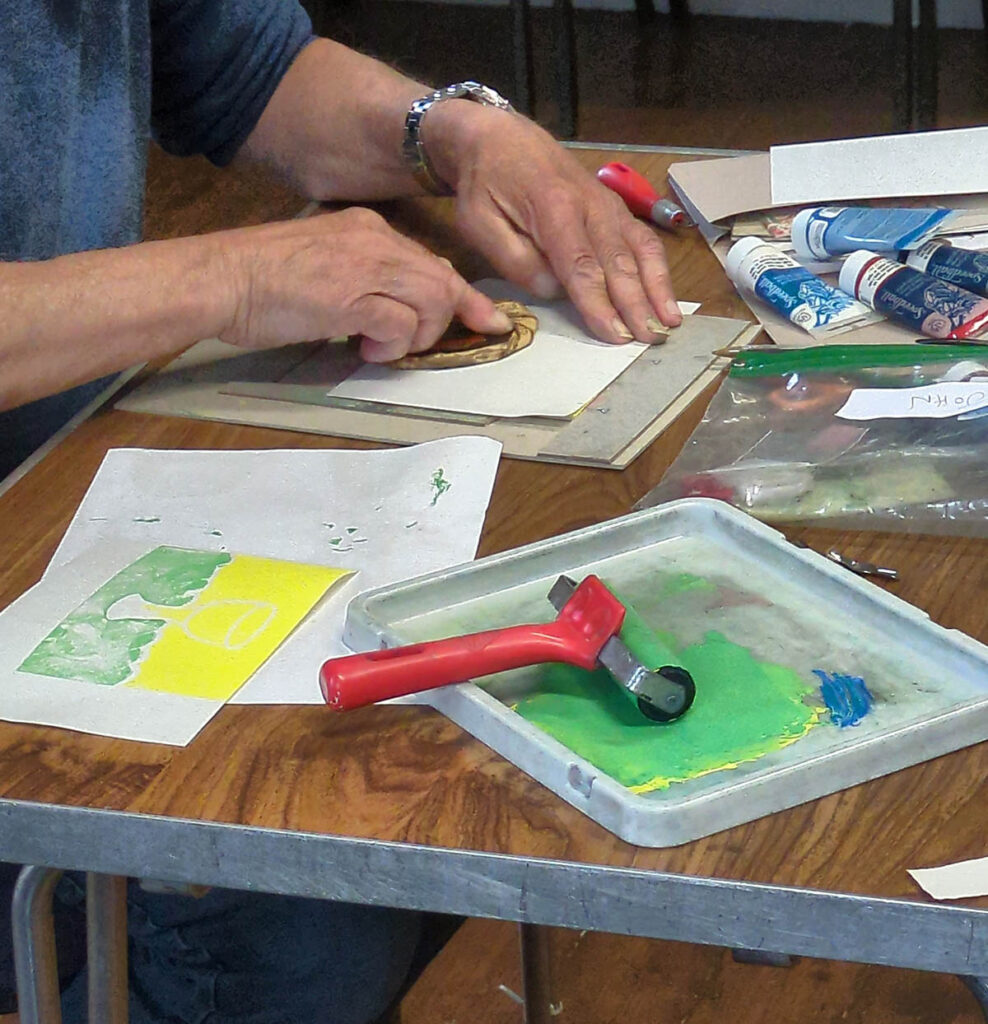
There are many ways to add colour to a lino print, such as chine colle, jigsaw linoprint, or using multiple plates for example. I am drawn to the reduction printing process however, which I find particularly absorbing due to the methodical nature of the technique, and the problem-solving aspect to it.

One problem, that of registering the prints accurately, can be easily solved with Ternes Burton registration pins. The print needs accurate registration so that each layer lines up to create the desired image. I map out a plan on the desk of where the lino will sit, then tape two Ternes Burton registration pins to the desk. Before going anywhere near my printing inks I place each piece of paper face down in the correct position and affix the tabs to the paper so that I will be held in exactly the same position each time I print.

Using more than one colour means that I need to plan the colour scheme carefully before beginning. I often use Photoshop to try out colours on my early sketches or proofs so that I can see how the colours will eventually work together. After that it is a case of deciding which colours to print first. As a rule it will be the lightest colours and the areas of the lino which are going to be easiest to remove after printing the first layer.

The next stage of carving takes some careful thought so that exactly the right areas of lino are removed and nothing else. I will usually mark the lino clearly with a sharpie at this stage.

The second layer of printing is when the Ternes Burton pins become very useful, helping me to accurately position the first printed layer over the second.

As you can see, it’s a lengthy process. Once you are aware of this technique you become attuned to notice the different layers of colour in other artists’ prints and really appreciate the time and effort spent.

Hints and tips for learning the reduction printing method;

Plan carefully. You need to learn to think in reverse and this can take some time to get used to. We are more accustomed to creating colour effects by adding media to the page, such as in a painting. With reduction lino we remove the lino to reveal colour we have already printed… quite a brain-teaser when you think about it!

Start simple. You don’t need a really complicated image to get good effects with this technique, so begin simple, with just two colours until you perfect the technique.

Always print more copies of the first layer than you think you will need. It’s repetitive but you will be less worried when the odd print misaligns or goes wrong later on.

Invest in a pair of Ternes Burton registration pins and accompanying tabs – it makes life so much easier!